Saturday, June 29, 2013

Popcorn Tree Prank

Anyone who attended a certain church as a child knows the song "Popcorn Popping on the Apricot Tree". This song celebrates the eruption of spring blossoms on the fruit trees:

"I looked out the window and what did I see?
Popcorn popping on the apricot tree!
Spring has brought me such a nice surprise;
Blossoms popping right before my eyes!
I could take an armful and make a treat,
A popcorn ball that would smell so sweet!
It wasn't really so, but it seemed to me,
Popcorn popping on the apricot tree!"

Our little condo faces south and when all of the snow melted out of our yard this past winter, our neighbors across the drive (who face north) decided to donate their snow to our yard! They spent an hour or 2 shoveling enough snow out of their yard to cover ours. My girls decided we needed to prank them back. M remembered me talking about a time I popped 3 or 4 garbage bags of popcorn and trashed a friend's room and decided we should fill our neighbor's yard with popcorn.

We spent long months waiting for the snow to melt and spring rain to stop so we could pull our prank.

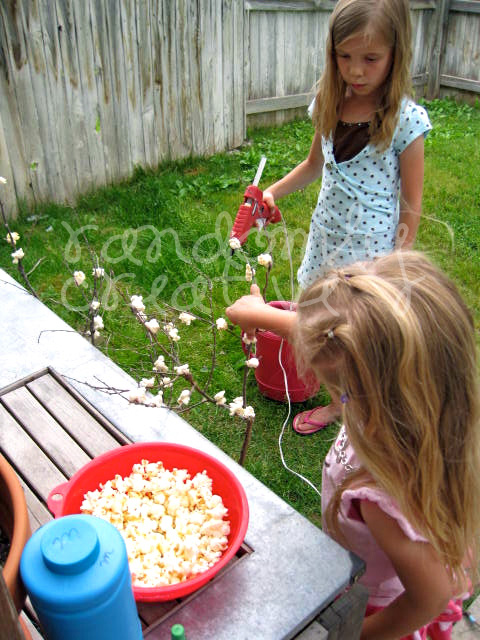
Last week, we pulled out an air popper and spent the afternoon popping 2 garbage bags of popcorn (1/2 a cup at a time!) and gluing popcorn to a bare branch we found outside.


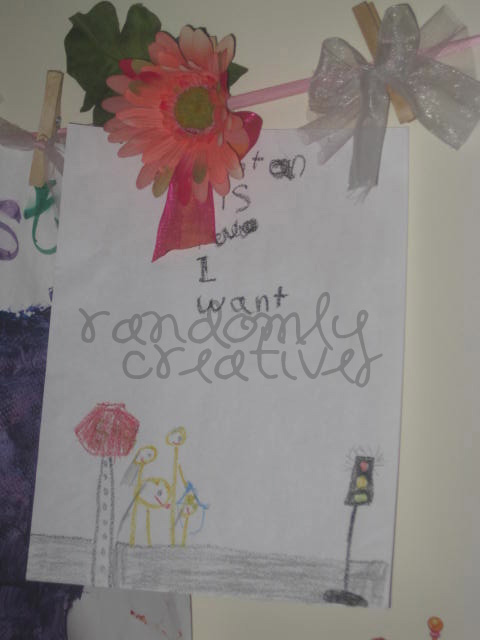
We added our poster board sign:


The next morning, before blinds were opened and neighbors got out of bed, we sneaked out and set our tree in the middle of the yard, with our sign toward their windows, then left a big mound of popcorn and scattered it out from the center!


The girls then rang the door bells of both adjoining condos and we ran back to watch through the crack in our own blinds. Only one of our neighbors came to the door- we saw the door open and then shut and about a minute later the little boy who lives there came running out. He looked at the tree and smiled curiously, then walked around the tree to investigate. Then he looked around and tentatively picked up a popped kernel and nibbled it. When he was sure it was real he took a bite and grabbed a few more. For the rest of the day there were neighbor kids in the yard eating popcorn off the lawn!

This was such a fun (and so harmless) prank and the girls loved it! If you want to do it all you really need is popcorn. 2 or 3 large bags of popping corn should cover a good sized lawn and even without a Popcorn Tree, your neighbors will laugh at their popcorn blizzard-ed yard.

If you want to go all out, you'll need a tree-like branch. You can stick it directly into the lawn or use a planter like we did. Make a sign with the lyrics above, or just the first 2 lines. Glue some popped kernels to your branch along with your sign. As for popping the popcorn- I'd recommend borrowing an extra air popper or 2. 1/2 a cup makes a large bowl and 1 large bag made enough to fill a 13 gallon garbage bag + about 1/3 of another. Just make sure whomever you choose as a target will take it in good humor- but I can tell you most people with kids will get a kick out of it- even just for the reaction of their little ones.

Happy Pranking!

Wednesday, May 29, 2013

Child's Art Clothes Line


If your children are like mine, then you have an overflow of paintings, drawings, coloring pages, and collages- maybe stacked in piles, maybe falling off the fridge. But I came across the cutest way to display your children's art and keep it organized. The basics you will need are a couple thumb tacks, a length of string, ribbon, or clothes line and clothes pins. If you want to be extra creative, have some decorative ribbon and fake flowers or other embellishments, as well as some hot glue. You will also want to have a folder for each child with their name on it.


First cut a length of your basic string, ribbon, or line, to fit the wall space you want to cover with extra for a little slack and to tie a knot or bow on the end. (I used ribbon for the 3 of mine, I made.)

Next, tie both ends of your line into a knot or a bow, depending on the frilliness you desire!

Now tack the bows or knots to the wall with some slack between the ends.


If you want the minimalist version, just attach your clothespins, (I used 5), and your line is ready for your child's masterpieces. If you want the frillier version then have your hot glue gun ready and attach your embellishments to your clothes pins, making sure not to glue the clothespin shut! once the glue dries you can clip your clothespins to the line and you're done!


Now when your child wants to add art work to the display, have them choose which item they are going to remove to put up their newest project. If the one they choose to take down is something you want to save, I would suggest writing a description of what it is on the back along with the child's age. Then put it in their folder to save for nostalgia. If the piece is destined for the trash, (I've slowly learned, we just can't keep everything!) then dispose of it discreetly, so you don't hurt your child's feelings.


This one is mounted in the corner of my M's room.


This one in A's room had a little too much slack, so it hangs vertically on the end- which makes me think you could make one that hangs completely vertical, if you wanted.

Wednesday, May 8, 2013

From Hat Boxes to Wedding Cake

Being the creative individual I am, there are times I think I can do anything; even making a wedding cake... though I can hardly make a birthday cake... Let the experiment commence!
I decided if I was going to make a wedding cake that I better get busy with my trial and error phase. I kept reflecting back on my daughter's cupcake-tiara fiasco (the poor thing looked like something from a Dr. Seuss nightmare and toppled over upon completion of the Happy Birthday song) but I knew I could do it. It's just a cake. Right?
So after researching on the net a bit I decided to try out marshmallow fondant. It seemed easier than homemaking regular fondant and so it was a natural choice. The resulting concoction was white and powdery and so unworkable that it just kept breaking or getting massive holes when I tried to roll it out. It was apparent I'd need to work with small pieces of it- sort of a patchwork quilt of fondant over the cake. So I found some cute little heart cookie cutters and it was the answer to my coverage problems... sort of.


But I could see the vision of it- I only needed some practice, and this would work out beautifully!


Did I mention this little 8x8 cake weighed, like, 20 pounds?! Magnifique! (Or not so much!)

So it was back to the drawing board, or more accurately, the internet, where I found some great ideas for cake stands. And it occurred to me: If I could make the cake stand the focal point, it wouldn't matter how plain the actual cake was. I headed off to the craft store for more inspiration, where I found them- round stackable hat boxes- and I knew that a great wedding cake would be found within. As I headed home with my find I wondered how I would turn these ordinary paper mach'e hat boxes into a cake. Should I paint them, cover them in fabric, and then set cute cupcakes down inside?

Why not cover the boxes in fondant? Make them as close to a real cake as possible, without using real cake! It was genius. And mad.

My dear friend and neighbor heard of my exploitations and wanted to help. Then her sweet mother, who is crafty and creative, (and has decorated real cakes before) also wanted to help. So she came down 3 hours from her home, to help with this half-hitched idea of mine. She must have thought I was nuts when I told her how I thought we'd make this whole thing work! And so we started, rolling out our fresh white (store-bought) fondant and adding yellow food color to it, to get a slightly creamy looking color.


All was going great until we got to the bottom box- the BIG one! Now we were rolling out a circle of fondant meant to cover a round box, probably 2 feet across with sides 5 or 6 inches high. Once we got the massive sheet of fondant on top and centered, the sides started breaking off under its own weight. We rolled out, probably 3 times before we decided to ditch that idea. Then one of us came up with the brilliant thought of using just the biggest boxes lid. with only 2 inches of side to cover, it was a success.

We pressed out fondant polka dots and attached them and the ribbon to our "cake" and it was finally starting to come together.


The morning of the wedding came and as I started to prepare my masterpiece for transport, I notice that the polka dots on the back half are missing in action. Both my girls are completely baffled as to how that could have happened, Good thing we punched out extras! And we are off...


Bottom layer = extra large hat box lid; short wide vase filled with ribbon and river rock placed right in the middle with cupcakes all around; Next layer gently and squarely placed on the vase. The medium hat box with a homemade belt buckle (chipboard painted with metallic paint) baring the bride and groom's initials, also gets a short wide vase placed in the middle of it with cupcakes all around. The top layer and wooden horseshoes painted to match the buckle make this western-themed cake complete.

My opus is finished! And I will never do a wedding cake again... but at least I know I can... Sort of.